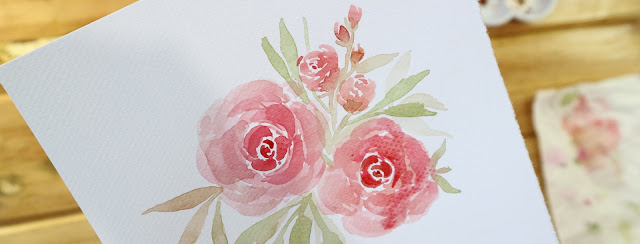
Loose Florals II (Rose)
Rose is definitely one of my favorite flowers to paint. It can be a little more complicated than the loose floral technique that I also discussed in this blog. However, once you get the hang of it, it will be really easy (and even addictive) to paint rose bouquets and wreaths. So, let's start.
Materials
- Watercolor Paper
- Watercolor (I used For Studio's Crimson Red, Burnt Sienna, and Grass Green in this post)
- Watercolor Brush (Round)
- Water
- Tissue/ Kitchen Towel
Color Study
For this tutorial, I used Crimson Red, Burnt Sienna, and Grass Green. The combination of these colors creates more of a sepia tone rather than a vibrant floral painting. However, you can change the colors to whatever you like.
When I pick the colors I am using for loose florals, I choose colors from the same family since loose florals requires wet-on-wet technique and using complementary colors can make the color mixes look muddy.
I always make sure that I apply mixes of the colors I chose to create harmony. In the video I posted below you will see me use a mix of the crimson red and grass green for the leaves and a mix of burnt sienna and crimson red for the flower buds. This makes the painting come together.
Basic shapes
Loose roses uses 2 basic shapes that will come in variety of sizes. First is a dot in the center and then crescent moon shapes surrounding that dot. The crescent moon shape has to get bigger as it moves away from the center, giving the illusion that the flower is in full bloom.

First (Green): Green dot at the center and two crescent moon shapes around it
Second (Blue): Three crescent moon shapes.
Third (Pink): Three bigger crescent moon shapes
Fourth (Orange): A variety of small and big crescent moon shapes based on your liking
Let's paint the shapes
First paint the dot. Always keep in mind that the center should have the most pigment, so all you have to do is to dip your brush a little bit in the water before painting the next row of petals.
 |
 |
 |
Add leaves.
Now, it is your turn to try it.
If you try this technique out and decide to post in on facebook and/or instagram don't forget to tag me so I can see it
Instagram: lapisatbrotsa
Facebook: Lapis at Brotsa
Enjoy!
By the way, if you want to make the flower look more detailed you can simply add a second layer once it's a almost dry. You will follow the same procedure you did before. Start adding more color in the center and work your way out. You can see how I added a second layer on the video below.
Real Time Demo of How I Paint My Loose Roses


I just have to say thank you a million and then a million more! I am new to watercolour and started attempting to learn back in November of 17. Roses have been more than elusive until your video and now, I have a rose! Your teaching style got thru this old brain, cobwebs and all, and a recognizable rose emerged. Again, you are a miracle to get to this old gal.
ReplyDelete